

Quick Answer: To use an HIV rapid test correctly, follow each kit step exactly, then wait 15–20 minutes to read the result. Two visible lines (no matter how faint) usually mean positive; one line at “C” only means negative. An unreadable or no-line result means invalid and must be repeated.
What Comes in the Box (And What Not to Ignore)
Let’s start by opening the kit. Most FDA-approved at-home HIV rapid test kits come in tamper-proof packaging. Inside, you’ll usually find a sealed test cassette, a small dropper or pipette, a buffer solution vial, a lancet (for fingerstick), and an alcohol wipe. There may also be a disposable cup for blood collection and an instruction booklet, often in multiple languages, sometimes with illustrations that only make sense if you already know what to do. One overlooked detail? The test’s expiration date printed on the foil pouch or outer box. Using an expired test can lead to misleading or unreadable results, even if it looks physically intact.
Storage also matters more than people realize. These test kits aren’t as fragile as a soufflé, but they do require a stable environment. Keep them at room temperature, ideally between 36°F and 86°F. Leaving the kit in a hot car, damp bathroom drawer, or freezing luggage can damage reagents and skew results. If you’ve traveled recently or found the kit in storage, it’s worth double-checking before you proceed.
Some kits also include a small desiccant packet. Don’t remove it until you're ready to test, it helps control moisture inside the packaging and prevent degradation. If any parts are missing, damaged, or unsealed, do not use the kit. It’s not worth the gamble.
Before You Prick: Prep Right to Avoid Ruined Results
The moment you open the box, the countdown begins, not just the literal timer once you start the test, but the psychological clock of your own anxiety. It’s tempting to rush. To skip reading the instructions, to trust your memory, or to guess based on a YouTube video you watched last week. Don’t. Most invalid results happen not because of faulty tests, but because of rushed, skipped, or misunderstood steps.
Wash your hands thoroughly and dry them completely. Even slight moisture can dilute the blood droplet. If your fingers are cold, rub them together or run them under warm water, circulation matters, and you’ll need enough blood to fill the dropper without squeezing too hard. Choose your ring or middle finger. Clean it with the alcohol wipe and wait a few seconds for the skin to dry fully, alcohol residue can interfere with the sample.
The lancet should be pressed firmly against the side of your fingertip. Not the pad, not the nail, not somewhere random. Press until it clicks. If it doesn’t, don’t reuse it, most are single-use. Gently massage the finger from palm to tip to form a small, hanging drop of blood. Avoid squeezing hard, as this can mix tissue fluid with the sample, potentially invalidating the result.
Step-by-Step: Running the HIV Rapid Test Without Guesswork
Now it's time to apply the sample and wait. This is the part that makes your heart race. Most quick HIV tests are lateral flow immunoassays, which work like a pregnancy test but with blood. To start the reaction, you put a drop of blood in the sample well and then add a few drops of buffer solution. The liquid flows through the membrane strip inside the cassette, where it can bind to HIV antibodies and change color.
Set a timer for 15 minutes. Resist the urge to peek early or over-check. Looking too soon might give you an unreadable result. Looking too late, past 20–25 minutes, can cause evaporation lines or ghost bands that don’t reflect reality. This test isn't like baking, where "a little longer" is harmless. It’s timed chemistry, and it matters.
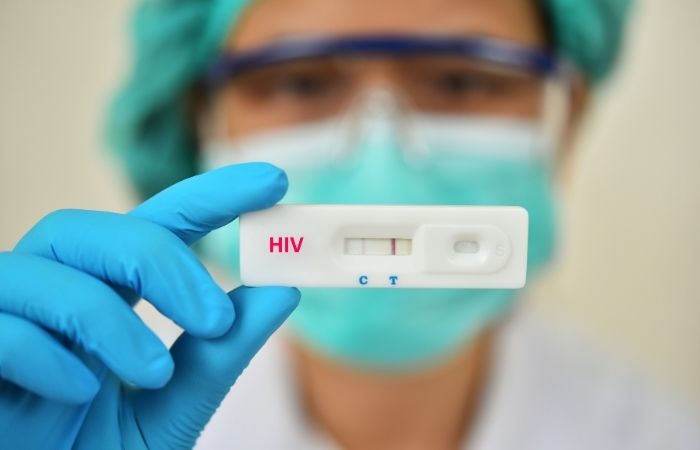
Place the cassette on a flat, clean surface. Don’t tilt it. Don’t move it around to different lighting angles every few minutes. You’ll only add confusion. Once the timer ends, look directly at the results window. You’ll see one of several possible outcomes, each with very different meanings, and very different next steps.
| Visible Lines | What It Means | Next Steps |
|---|---|---|
| One line at "C" | Negative | No HIV antibodies detected. Retest in future if recent exposure. |
| Two lines at "C" and "T" (even faint) | Positive | Likely positive. Follow up with confirmatory lab test immediately. |
| No line at "C" or only line at "T" | Invalid | Test didn’t work. Repeat with a new kit. |
Table 1. How to interpret HIV rapid test cassette results and what to do next.
People are also reading: You Could Have Herpes and Not Know It
When “Faint” Isn’t Fake: Understanding Line Strength
Here’s the part that throws people into spirals of Google doom: the faint line. It’s not bold. It’s not obvious. It almost looks like a shadow. So... is it real? The short answer: yes. If a line appears at the “T” (test) zone, no matter how light, and there’s a clear line at “C” (control), it typically indicates a positive result. Line intensity is not a measure of viral load, disease stage, or severity, it’s just a signal that the test’s antibody detectors reacted with something in your blood.
That said, faint lines can be confusing when they show up after the recommended 20-minute window. A reader named Carlos shared this experience anonymously: “I checked the test at 22 minutes and saw a ghost of a line that wasn’t there before. I freaked out. But the hotline said it was probably an evaporation line and not valid.” He's not alone. False interpretations often happen when test windows are ignored. That's why manufacturers and health organizations stress that result windows are binding, not suggestions.
If you're unsure, don’t rely on wishful thinking or doomscrolling. Contact a local clinic or telehealth provider and take a confirmatory lab test. These second-step tests, usually ELISA or PCR-based, don’t depend on line visibility or timing guesswork. They're highly accurate and can give you peace of mind, even if your rapid test left you in limbo.
Check Your STD Status in Minutes
Test at Home with RemediumHIV Rapid Test Kit

 For Men & Women
 Results in Minutes
 No Lab Needed
 Private & Discreet
Order Now $33.99 $49.00
What Can Invalidate a Test (And How to Avoid It)
Invalid results aren’t rare. In fact, they happen often enough that most manufacturers dedicate a full page of their booklet to them. The most common causes? User error, expired kits, bad storage, or improper blood sample collection. For example, if you touch the test strip directly, use too little blood, or tilt the cassette during the flow window, you can interrupt the chemical reaction needed to generate a control line. And if there's no control line, nothing else on that test matters, it’s unreadable by design.
Another common mistake is using the wrong fingerstick technique. Excessive squeezing, reusing the lancet, or collecting blood from under the nail can lead to contaminated samples. One Reddit user described a test where no lines showed at all, only to realize later they had applied buffer solution first, before the blood drop, out of order. There’s a reason the kits include detailed steps, often with arrows and numbered pictures. Follow them like a recipe, not a vibe.
Don’t try to “fix” an invalid test by guessing. If the cassette looks off or behaves strangely, flooded window, smeared lines, broken plastic, missing wells, do not rely on that result. Use a new kit, preferably from a separate box or batch if you have one. It’s also wise to wait at least 24 hours between tests if your first was flawed, to let anxiety settle and collect a better sample.
| Problem | Possible Cause | Solution |
|---|---|---|
| No lines at all | Expired test, incorrect use, faulty cassette | Use a new kit, double-check instructions |
| No control line, but test line visible | Improper sample placement or timing | Discard test, retest with proper technique |
| Blurry or streaked lines | Contaminated blood, too much buffer, or tilt | Keep cassette flat, clean fingertip thoroughly |
Table 2. Common HIV test errors and how to troubleshoot them.
How to Dispose of the Test (Without Drawing Attention)
When you're done, there’s still the final mental hurdle: getting rid of the test kit discreetly. Many readers worry about privacy, especially those living with roommates, family, or in dorm housing. Used lancets are considered biohazardous, even in at-home settings, and should never be flushed or tossed loosely into kitchen trash. Some kits include a small disposal bag, but most don’t.
To dispose safely, place the lancet, pipette, and used cassette in a sealed plastic bag. Wrap it in paper or tissues, then toss it in a non-transparent trash bin. If you're in a public place or traveling, carry a ziplock or resealable pouch ahead of time. Do not reuse any parts, and never store a used cassette “just in case.” It doesn’t provide long-term data, and the results can degrade within hours, leading to panic if you revisit them later.
If you’re worried someone might discover the kit, consider disposing of it in an outside bin or waiting until trash day. You owe no one an explanation, but you do deserve peace of mind in how you manage your health privately.
Troubleshooting: When the Test Doesn’t Match Your Gut
Let’s say the test says negative, but your gut is screaming otherwise. Maybe your partner recently disclosed they were positive. Maybe you’re having night sweats and unexplained fatigue. Or maybe you tested too soon after exposure, and you’re now trapped in the mental loop of “what if it’s too early to detect?”
This is where the concept of the window period becomes essential. Rapid HIV tests detect antibodies, not the virus itself. That means they only work once your immune system has had time to respond. Depending on the test brand and your body, this can take anywhere from 18 to 90 days. Testing before this window may produce a false negative, even if you’ve been exposed. It’s not the test lying; it’s your body not producing enough detectable markers yet.
A man named DeShawn shared his timeline: he tested negative on day 14 after a high-risk encounter, then positive on day 28 using the exact same brand. “I almost skipped the second test because I was so sure the first one meant I was fine,” he said. “Now I tell everyone, don’t assume early results are final.” His story isn’t rare, and it’s not a failure. It’s biology doing its thing. The key is not to test once and disappear. It’s to test again at the right time.
People are also reading: Oral vs. Genital Herpes: What’s the Difference and Does It Matter?
What to Do if the Result Is Positive (Or Just Looks That Way)
First: breathe. A positive HIV rapid test is not a death sentence, and it’s not the end of your health or your sex life. But it is a call to action. Rapid tests are screening tools, not final diagnoses. Every positive needs to be followed up with a lab-based confirmatory test, ideally through a clinic, telehealth provider, or local health department. That follow-up test will likely be an ELISA or Western blot blood test that confirms whether HIV antibodies or antigens are truly present.
Next, think about your safety and your support. If you're sexually active, consider pausing sexual activity until your result is clarified. If you have partners, you don't need to disclose anything before you're sure, but if you’re comfortable, a heads-up can prevent further anxiety down the line. There are also partner notification programs (anonymous or assisted) that can help if a positive is confirmed.
Mental health matters here too. A 2022 study published in Sexually Transmitted Diseases found that nearly 40% of first-time positive HIV testers reported intense panic in the 48 hours after reading their result, often due to misunderstanding what it actually meant. Counseling, even for 15 minutes through a virtual service, can ease that storm. You don’t have to wait alone. And you shouldn’t.
There’s also treatment. Antiretroviral therapy (ART) today can reduce the virus to undetectable levels, meaning it’s not transmittable through sex. The earlier treatment starts, the better your long-term outcomes and the easier it is to protect current or future partners.
Check Your STD Status in Minutes
Test at Home with Remedium7-in-1 STD Test Kit
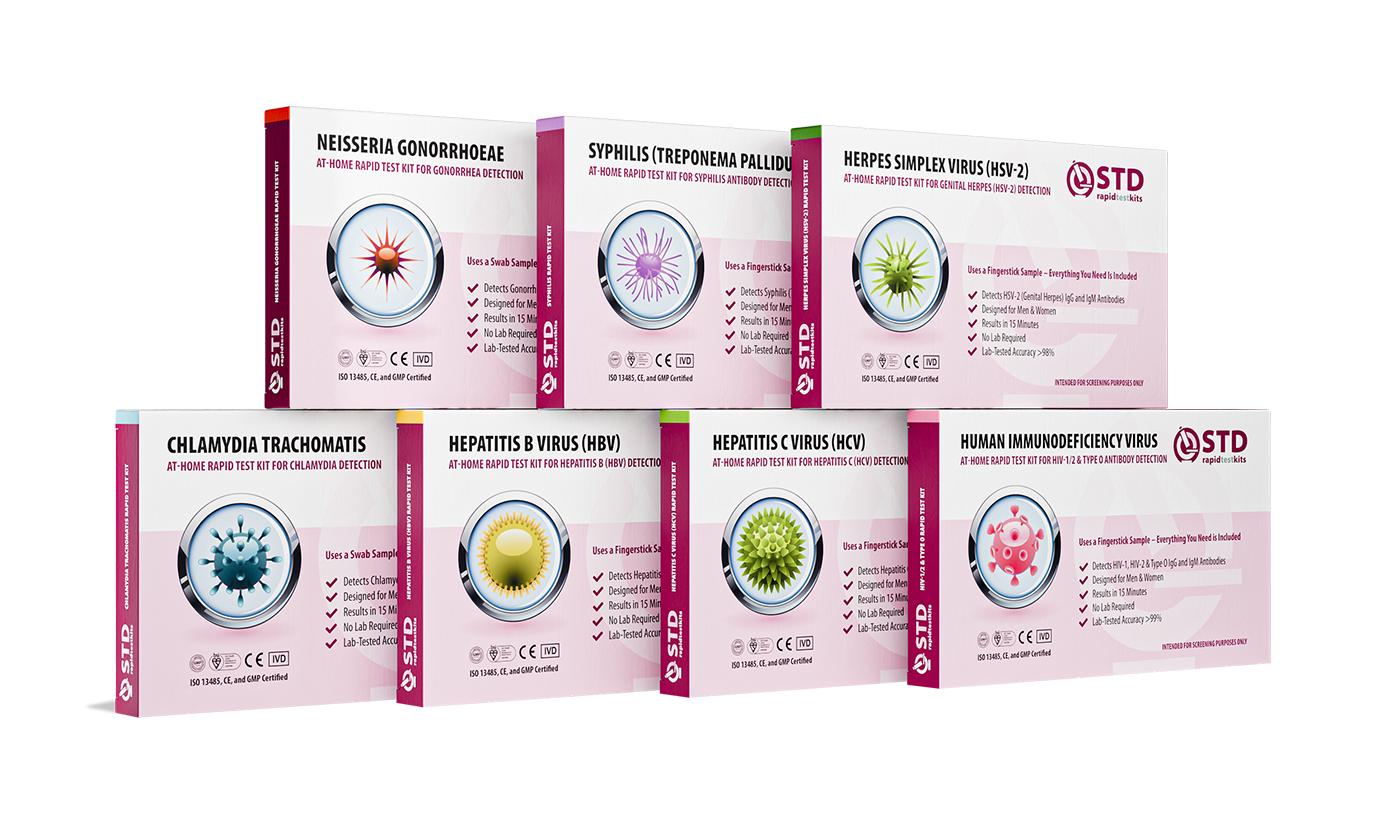 For Men & WomenResults in MinutesNo Lab NeededPrivate & Discreet
Order Now $129.00 $343.00
For all 7 tests
Need to Retest? Here’s When and Why
Sometimes, one test isn’t enough, not because the first result was wrong, but because testing is a snapshot, not a timeline. If your test was negative but exposure was recent (within the last 90 days), retesting is wise. For example, if you had a high-risk encounter two weeks ago and tested today, plan to test again in 4–6 weeks. That gives your immune system time to develop detectable antibodies and ensures you’re not getting a false sense of security from an early negative.
If your first test was invalid or confusing, faint lines outside the time window, missing control line, smudged cassette, you should repeat it immediately with a fresh kit. Don’t wait days. Don’t reuse the same sample. The same goes if you think the kit may have been stored improperly or is expired.
If your first test was positive and a follow-up test is already underway, no need to keep re-testing in the meantime. Trust the process. Over-testing during that period can lead to more anxiety, especially if different kits yield different sensitivities. Focus on confirmatory care, not validation spirals.
For peace of mind, many users opt for a combo test kit that screens for multiple STDs at once, especially if they had multiple partners or symptoms that could point to more than just HIV. One option is the Combo STD Home Test Kit, which tests for HIV alongside other common infections in a single session.
Privacy Still Matters: Testing Without Losing Control
It’s not just the test result that people fear, it’s the judgment that might come with it. That's why at-home HIV tests exist in the first place. You don’t have to explain your history to a stranger, ask for time off work, or sit in a waiting room hoping no one recognizes you. But even at home, privacy concerns linger. What if someone finds the box? What if a roommate hears you on the helpline?
Discreet packaging is standard with most at-home kits. They ship in unmarked boxes, often with no health branding or visible identifiers. Billing is usually vague too, often under “health systems” or neutral vendor names. If you’re ordering online, check the vendor’s FAQ to confirm those details. STD Rapid Test Kits, for instance, ships with full discretion and does not include the test name on the label. You can order directly through their homepage here.
For emotional support, anonymous hotlines are available 24/7. The CDC’s National HIV Hotline (1-800-CDC-INFO) and services like Project Inform offer real talk from trained counselors, without tracking your data or requiring your name. Your privacy isn’t just a luxury. It’s a right. And it’s built into the testing experience from start to finish.
FAQs
1. Can I really trust the result from a home test?
Yes, but with some caveats. If you follow every step to the letter, fingerstick, buffer drops, wait time, most FDA-approved HIV rapid tests are over 92% accurate at detecting antibodies. But if it’s been less than three weeks since exposure? That negative might not mean you’re in the clear yet. Your immune system needs time to catch up. So yes, trust the result, but trust timing too.
2. I saw a super faint line at the “T” line. Am I positive?
If the control line shows up and there’s any visible line at the “T”, even a whisper of pink or a ghost of color, it likely means positive. Faint doesn’t mean “maybe.” It means you need a confirmatory lab test. Don’t overanalyze shade or thickness. Think of it like a traffic light: red is red, even if it’s dim.
3. What if I looked at the result 30 minutes later and saw a new line?
That’s called an evaporation line. It’s sneaky and emotionally brutal. But it doesn’t count. Always read your result at the time window listed on your kit, usually 15 to 20 minutes after applying the buffer. After that, all bets are off. Don’t trust what shows up late.
4. I tested negative, but I still feel sick. Should I believe the test?
It depends how recently you were exposed. A negative test is most reliable when taken after the window period, usually at least 3–4 weeks after risk, and more accurate after 6 weeks. If your test was early and symptoms are worrying you (fever, rash, night sweats), it’s worth retesting and/or getting a full clinical panel.
5. Does PrEP affect HIV test results?
It can. People on PrEP may develop antibodies more slowly, which can delay detection on antibody-only rapid tests. If you’re on PrEP and want the most accurate read, go for a fourth-generation lab test (antigen + antibody). Talk to your provider if you’re unsure. Or test both ways if you’re anxious.
6. Is it okay to take the test at night or alone?
Absolutely. Many people prefer to test when the world is quiet and they can think clearly. Just make sure the lighting is good, your hands are clean, and you’ve set a timer. Keep a mirror nearby if you need help lining up the cassette. You don’t need a partner or a lab coat to get clarity.
7. Do I need to tell anyone if the result is positive?
That’s your call, but if it’s confirmed by a lab, you’ll eventually need to think about partner notification. That doesn’t mean broadcasting it. There are anonymous notification tools, telehealth providers who can help with scripts, or even text templates if you’re not ready for a phone call. You get to decide the when and how.
8. How long should I wait before testing again?
If you tested soon after exposure, like within 1–2 weeks, plan a retest at the 4–6 week mark, then again at 12 weeks if you want full peace of mind. If you tested positive, follow your provider’s schedule. And if the result was invalid or weird-looking? Retest as soon as you can with a new kit. Preferably one stored properly this time.
9. Can I get a false positive?
Yes, but it’s rare. Some autoimmune conditions or technical errors (like reading after the result window) can trigger false positives. That’s why positive rapid results always require a second test at a clinic or lab. But if your test is positive and your exposure was real, don’t assume it’s a fluke. Get confirmation and take next steps.
10. Do at-home tests expire?
They do, and it matters. Most kits have a shelf life of 12 to 24 months. Using an expired test is like baking with expired yeast: it might look fine, but it won’t work properly. Always check the date on the foil pouch. If it's past due, toss it and grab a fresh one. Your peace of mind deserves better than guesswork.
What Comes After the Result? Your Next Step Is Power
Reading that test cassette might feel like a final verdict, but it’s really just the beginning. Whether your result is negative, invalid, or potentially positive, you now have more information than you had before. That’s not failure. That’s power. The kind that lets you protect yourself, talk openly with partners, and take action, quietly, confidently, and on your own terms.
Don’t wait and wonder, get the clarity you deserve. This at-home combo test kit checks for the most common STDs discreetly and quickly.
How We Sourced This Article: We combined current guidance from leading medical organizations with peer-reviewed research and lived-experience reporting to make this guide practical, compassionate, and accurate.
Sources
1. Self Testing | HIV Testing | Let’s Stop HIV Together – CDC
2. Getting Tested for HIV – CDC
3. HIV Testing Overview – HIV.gov
4. Information Regarding the OraQuick In‑Home HIV Test – FDA
5. Accuracy and User‑Acceptability of HIV Self‑Testing Using an Oral Fluid–Based Kit – PLOS ONE
6. Reliability of HIV Rapid Diagnostic Tests for Self‑Testing – The Lancet HIV
7. The Evolution of HIV Self‑Testing and the Introduction of Digital Interventions – PMC
About the Author
Dr. F. David, MD is a board-certified infectious disease specialist focused on STI prevention, diagnosis, and treatment. He blends clinical precision with a no-nonsense, sex-positive approach and is committed to expanding access for readers in both urban and off-grid settings.
Reviewed by: Kelsey Tran, MPH | Last medically reviewed: October 2025
This article is only for informational purposes and should not be taken as medical advice.


