

Published: October 2025 | Last updated: April 2026 | Editorial review and quality control: Martina N.
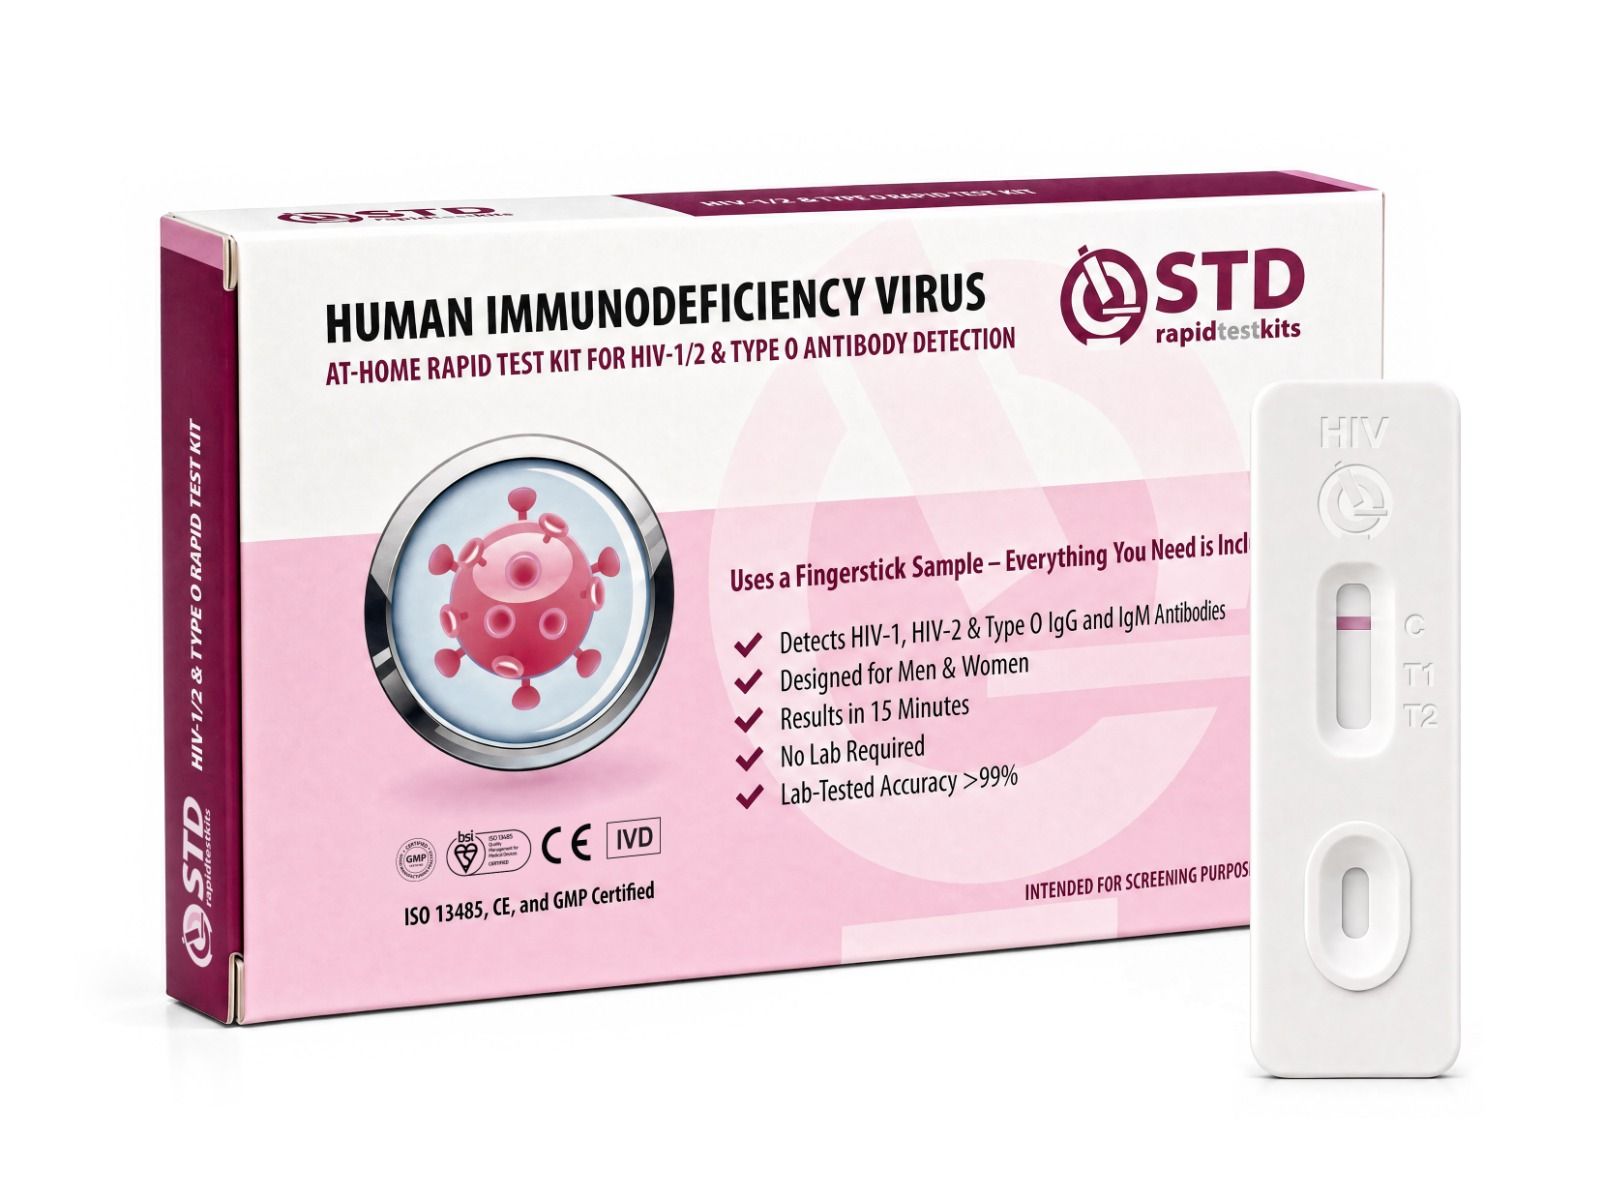
An HIV rapid home test is a small lateral-flow cassette that detects HIV antibodies in a fingerstick blood sample, the same antibody class that lab screening tests look for, just in a smaller and faster format. The cassette has two zones: a control zone marked C and a test zone marked T. After you put a drop of blood on the sample well and add the buffer, fluid wicks across the strip and either binds to HIV antibodies (producing a visible T line) or does not. The C line should always show up if the test ran correctly. That is the whole device, condensed into a credit-card sized piece of plastic.
What goes wrong, almost always, is the human steps around the cassette: rushing the timer, squeezing the finger too hard, reading the window in dim light, or testing too soon after a possible exposure. None of those are reasons to be embarrassed; they are predictable, and they are exactly what this guide is designed to walk you past.
How do you use an HIV home test correctly, and how do you read the result?
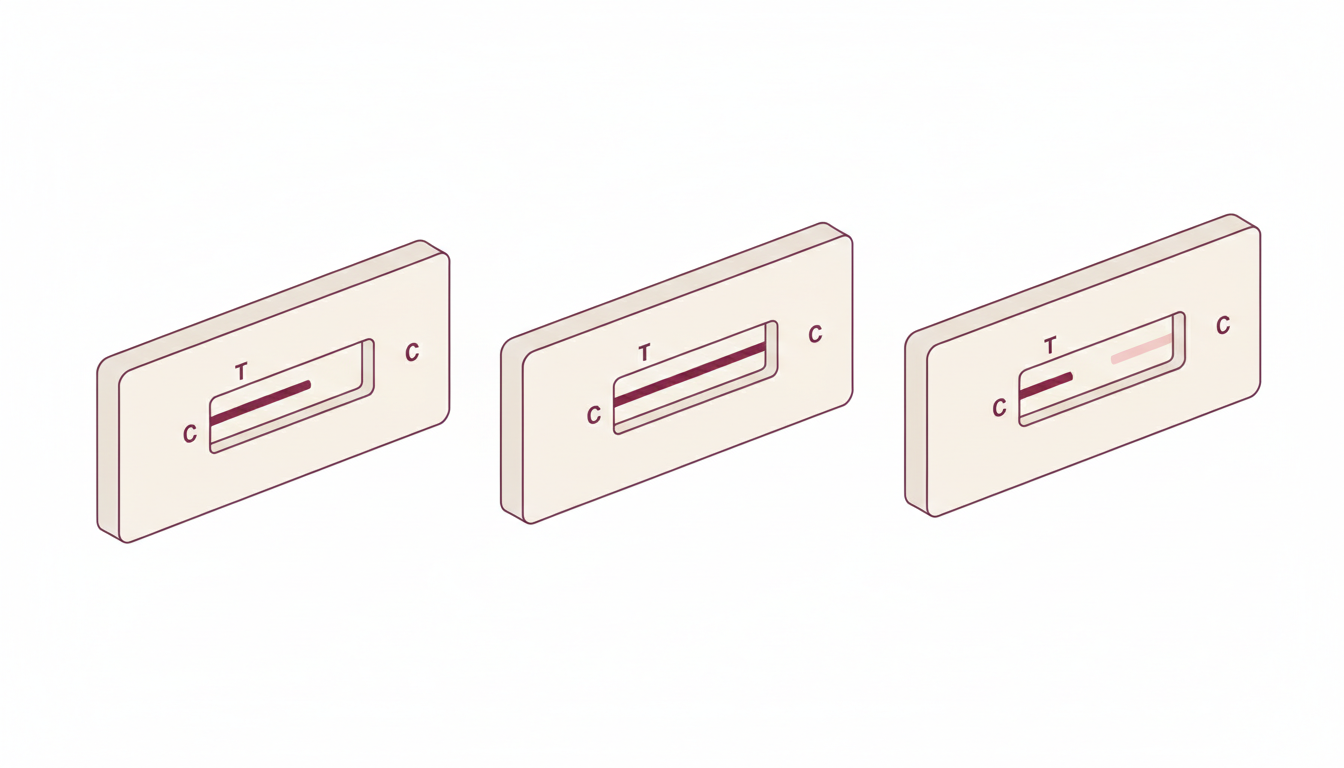
Wash and dry your hands, prick the side of your fingertip with the included sterile lancet, transfer the drop of blood to the cassette sample well, add the exact number of buffer drops printed on your kit (usually two to four), and start a timer for the window in your instructions, typically 15 to 20 minutes. Then read the cassette under good lighting at the time the kit specifies, not earlier and not later. One line at C only is non-reactive (negative). Two lines at C and T, even if the T line is faint, count as reactive (preliminary positive) and need lab confirmation. No C line at all means the test is invalid and must be repeated with a new kit.
Key Takeaways
- Two visible lines at C and T mean the result is reactive, even if the T line is faint. Faint lines count, and they call for a lab confirmation rather than a repeat home test.
- Most rapid HIV antibody self-tests give their most reliable result roughly 23 to 90 days after a possible exposure. A negative result before that window is not conclusive and should be repeated.
What Comes in the Box, and What to Check Before You Open It
FDA-cleared HIV rapid home tests ship in tamper-proof outer packaging with a sealed foil pouch inside. Open the pouch and lay every piece flat on a clean surface. You should see a plastic test cassette with a sample well and a result window, a sterile single-use lancet, a small dropper or capillary pipette, a vial of buffer reagent, an alcohol prep pad, and a printed instruction sheet (often multilingual). Many kits also include a small desiccant packet inside the cassette pouch; leave it sealed alongside the cassette until you are ready to test, since it keeps the strip dry.
Before you do anything else, check three things. First, the foil pouch is intact and not punctured. Second, the expiration date printed on the pouch or outer carton is in the future; reagents lose sensitivity past their shelf life and an expired strip can read as falsely negative. Third, every component listed on the instruction sheet is actually present. If the dropper is missing or the buffer vial is cracked, the kit cannot run reliably, and the right move is to set it aside and use a new one.
Storage matters more than people expect. Most rapid HIV cassettes require room-temperature storage between roughly 36 and 86 degrees Fahrenheit (around 2 to 30 degrees Celsius), per typical manufacturer instructions for use printed on the kit. A kit that has spent a summer afternoon in a hot car or a winter month in a freezing garage may give readings you cannot trust, even when the cassette looks fine, so check your kit's printed range before you start.
What you should find inside the box
- A sealed lateral-flow test cassette with C and T zones at the result window
- A sterile single-use lancet for the fingerstick
- A small capillary pipette or dropper for transferring the blood sample
- A buffer reagent vial with a measured-drop dispenser tip
- An alcohol prep pad for cleaning the fingertip
- A printed instruction sheet specific to your kit (often multilingual)
Before the Fingerstick: Prep That Saves the Result
Most invalid results do not come from defective tests. They come from rushed prep. So slow down for two minutes before the lancet ever touches your skin.
Wash your hands with soap and warm water, then dry them completely with a clean towel. Even a thin film of moisture can dilute the blood drop, and warm water also draws blood toward the fingertips, which makes collection easier. If your hands are cold, run them under warm water for 30 seconds or shake them at your sides, since cold fingers struggle to produce a single hanging drop without overzealous squeezing.
Pick the ring or middle finger of your non-dominant hand. Wipe the side of the fingertip (not the central pad and not the area near the nail) with the alcohol prep pad and let it air-dry fully for several seconds. Residual alcohol can interfere with the reagents, and pricking the very center of the pad hits more nerve endings than the side does, so the lateral aspect is genuinely less painful as well as more practical.
Lay out every component on a clean, flat surface in the order the instructions show them. A frequent procedural mistake is reaching for the buffer before the blood drop, or vice versa, simply because the components were not arranged in sequence and the user grabbed the wrong one mid-test. Arranging the kit left to right in step order takes thirty seconds and removes that whole class of error.
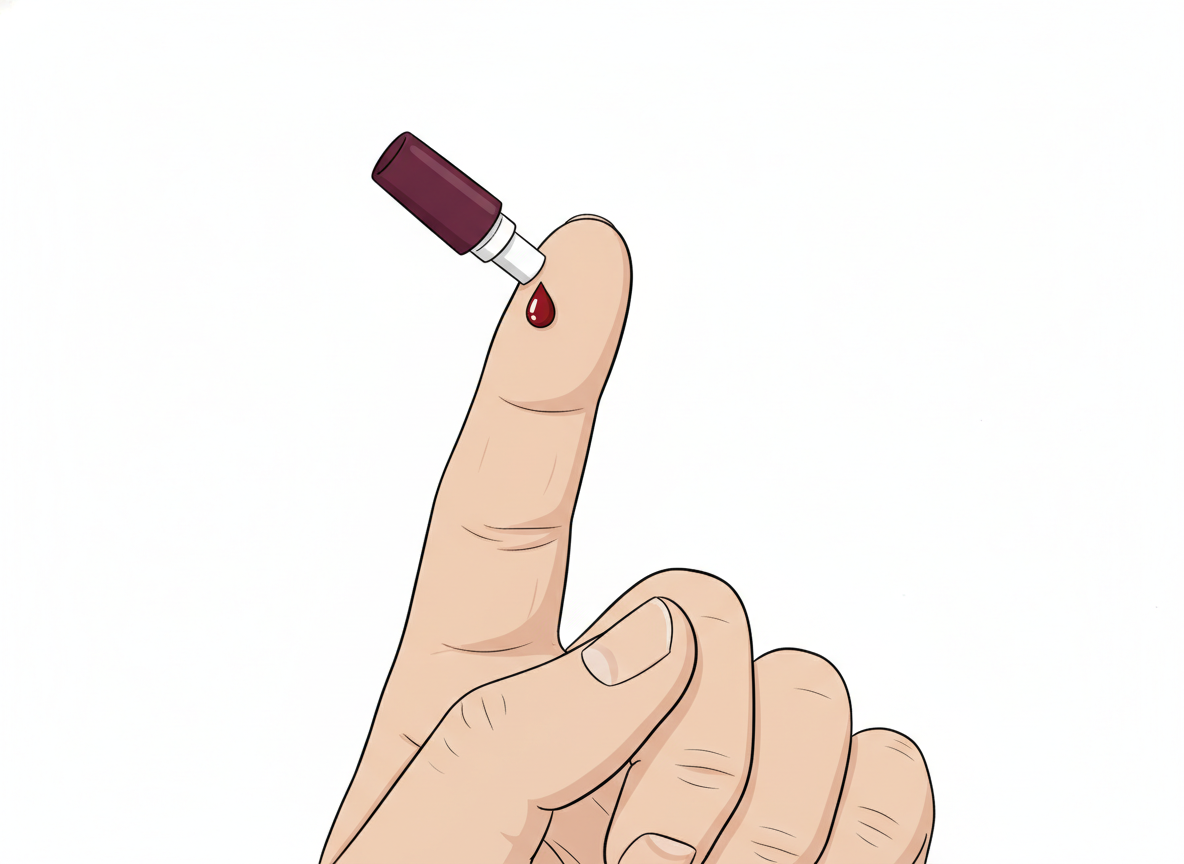
The lancet itself is single-use and pre-loaded. Press it firmly and squarely against the lateral side of your fingertip until you hear or feel the click that releases the spring. If the lancet does not click on the first try, do not reuse it; open a new one and try again, because a partially fired lancet will not pierce deeply enough to produce a clean drop.
Massage the finger gently from the base toward the tip to coax a single hanging drop of blood. Avoid hard squeezing or milking the finger repeatedly; that mixes interstitial fluid with the blood and can produce a sample diluted enough to misread. The drop should look about the size of a small bead.
Step-by-Step: Running the Test Without Guesswork
Read the full instruction sheet that came with your specific kit before you start, even if you have used a similar test before. Brand-to-brand differences in buffer volume, drop count, and read window are small but real, and the package insert overrides anything generic written here.
Once you have produced a hanging drop on your fingertip, transfer it to the cassette as the instructions specify. Most home kits ask you to use the included capillary pipette or dropper to draw up a small precise volume, then deliver it into the round sample well marked with an arrow on the cassette. Do not let the pipette tip touch the strip surface; hold it just above the well and let the drop fall.
Add the buffer next. The buffer vial is usually a small upright bottle with a measured dropper tip; you tilt it vertically and dispense the exact number of drops printed on your instruction sheet (commonly two to four). Too few drops and the fluid may not migrate the full length of the strip; too many and the result window can flood, washing out a real T line. Set the cassette flat and do not move or tilt it once the buffer is in.
Start a timer the moment you finish the buffer step. The standard read window for FDA-cleared rapid HIV antibody cassettes is 15 to 20 minutes after sample and buffer addition, though a few brands extend slightly. Reading earlier than the lower bound risks missing a slow-developing T line, while reading later than the upper bound risks evaporation lines (artifacts that look like T lines but are not antibody-driven). Set a phone alarm; do not eyeball it.
The most important single action in the whole procedure is starting a phone alarm for your kit's exact read window the second you finish dispensing buffer. Reading early hides a slow-developing T line; reading late lets evaporation artifacts mimic one. Set the timer before you sit down to wait, not after.
Reading the Result: One Line, Two Lines, or No Line at All
When the timer ends, place the cassette under good neutral lighting (a kitchen overhead works; bathroom mood lighting and direct sunlight do not). Look directly at the result window from straight on, not at an angle, since looking sideways through the plastic can fake a line that is not there. Compare what you see to the chart printed on your kit and the table below.
| What you see in the result window | What it means | What to do next |
|---|---|---|
| A single line at C only, no line at T | Non-reactive (negative) | No HIV antibodies detected. If your possible exposure was within the last 90 days, plan a repeat test at the right window. |
| Two lines, both C and T, even if T is faint | Reactive (preliminary positive) | Treat as positive. Schedule a confirmatory lab test at a clinic, telehealth provider, or local health department. Do not repeat the home test in place of confirmation. |
| A line at T only, no line at C | Invalid | The test did not run correctly. Discard and repeat with a fresh kit. |
| No lines at all, anywhere in the window | Invalid | The test did not run correctly. Discard and repeat with a fresh kit. |
| Smudged, streaked, or flooded window | Invalid | Likely a procedural error (too much buffer, tilting, or contamination). Discard and repeat with a fresh kit. |
When the T Line Is Faint: Why It Still Counts
The single most common spiral after an HIV home test is staring at a thin pink whisper at the T position and asking the internet whether a faint line is real. The short answer is yes. Lateral-flow cassettes work by binding HIV antibodies in the sample to a labeled detection reagent, which then becomes visible as a colored line at the T position. Line intensity tracks with how much antibody bound, not with severity, viral load, or stage of infection. A faint line means antibody was detected at a lower concentration than a bold line; it does not mean the test was unsure.
This is the part that genuinely matters: any visible T line, however pale, paired with a clear C line, should be treated as a reactive result. The CDC and WHO both classify reactive home and rapid tests as preliminary positive, requiring a follow-up confirmatory laboratory test before any final diagnosis (CDC, HIV testing; WHO HIV/AIDS fact sheet).
Timing is what separates a real faint line from a meaningless one. A faint line that appears inside the kit's read window of 15 to 20 minutes counts as reactive, full stop. A faint line or shadow that shows up only after the read window has closed, at 25 or 30 or 60 minutes, is almost certainly an evaporation line, a physical artifact from the strip drying out, and it is not interpretable as a result. Manufacturers print read windows precisely because the strip's chemistry is only stable inside that interval. If you are not sure whether you read your cassette inside the window, discard it and run a fresh kit.
What Can Invalidate a Test, and How to Avoid It
Invalid results are common enough that every manufacturer documents them inside the kit. The most frequent causes are user procedural errors (wrong order of steps, wrong volume of buffer, tilting the cassette mid-flow), expired or improperly stored kits, and contaminated samples.
Two silent failure modes account for a large share of invalid runs. Touching the strip surface inside the result window with your fingertip leaves skin oils that block the migration of the labeled reagent, and the strip never develops a control line. Collecting a blood sample from under the fingernail or from a deeply re-squeezed puncture mixes interstitial fluid into the drop and dilutes the sample below the assay's detection threshold. Neither one looks dramatic in the moment; both produce blank or partial results 20 minutes later.
If your cassette looks off, flooded, smeared, or missing the C line, do not interpret it. Open a fresh kit, ideally from a different batch if you have one, and rerun the test cleanly. Wait at least an hour between attempts so you are not rushing through the second one with anxiety in the driver's seat.
Disclosure: stdrapidtestkits.com publishes this guide and sells the at-home HIV rapid fingerstick test linked below. The product link goes to our own product page.
| What you saw | Likely cause | What to do |
|---|---|---|
| No lines anywhere in the window | Expired kit, defective cassette, or buffer added in the wrong order | Discard. Use a fresh kit and re-read the instruction sheet from the top. |
| Test line visible but no control line | Procedural error (wrong volume, tilting), or strip damage | Discard. Use a fresh kit and keep the cassette flat on the surface this time. |
| Smudged or streaked lines that do not match the kit's example image | Contamination, too much buffer, or tilt | Discard. Wipe the surface, clean the fingertip thoroughly, and run with a fresh kit. |
| A faint extra line appearing past 25 minutes that was not there at 20 | Evaporation artifact, not a true result | Disregard the late line. The valid read was the on-time one. |
The Window Period: Why a Negative Test Today May Not Be Final
HIV rapid home tests detect antibodies, not the virus itself. Antibodies are part of your immune system's response to infection, and they take time to develop in detectable amounts. The interval between exposure and a reliably detectable test is called the window period, and it varies by test type.
The CDC publishes current window-period ranges for each test type. Antibody tests, including most rapid home self-tests, can detect HIV in roughly 23 to 90 days after exposure. Combination antigen-antibody laboratory tests (so-called fourth-generation lab tests) can detect HIV in roughly 18 to 45 days. Nucleic acid tests (NATs), which look for HIV RNA directly, can detect infection in roughly 10 to 33 days (CDC, HIV testing).
What that means in practice: if you had a possible exposure within the last three weeks and you tested today and got a single C line, that is not a definitive negative. Plan a repeat test at the 6-week mark, then again at 12 weeks if you want a fully conclusive result. The early test is not wasted, since a reactive result at any point still means follow up immediately, but a non-reactive early test is best treated as preliminary.
PrEP (pre-exposure prophylaxis) and PEP (post-exposure prophylaxis) can also blunt or delay seroconversion in some people, which means antibody-only home tests may turn reactive later than the standard 23 to 90 day range. If you are taking either medication and want a precise read, a fourth-generation antigen-antibody lab test ordered through a clinic or telehealth provider is the more appropriate tool. Talk to your provider about timing rather than guessing on a home test.
Window-period ranges by HIV test type
- Antibody tests (rapid home self-tests): can detect HIV roughly 23 to 90 days after exposure
- Combination antigen-antibody lab tests (fourth-generation): can detect HIV roughly 18 to 45 days after exposure
- Nucleic acid tests (NAT, HIV RNA): can detect HIV roughly 10 to 33 days after exposure
- PrEP and PEP can extend the antibody-test window in some people; ask a provider about a fourth-generation lab test if you are on either medication
If the Result Is Reactive: What Comes Next
A reactive home test is not a final diagnosis, and it is not a verdict on the rest of your life. It is a screening result that calls for one specific next step: a laboratory confirmatory test, ideally a fourth-generation antigen-antibody assay or a nucleic acid (RNA) test ordered through a clinic, urgent care, telehealth provider, or local health department. That confirmatory test usually returns within a few days and gives a definitive yes or no.
Before the lab result lands, the panic interval is real and tends to peak in the first 48 hours; breathe through it. Do not repeat a second home test as a substitute for lab confirmation, since two home tests with the same chemistry are not independent of each other and a reactive first kit will almost always read reactive again on a second one. Pause new sexual contact until the confirmatory result is in, both for your peace of mind and to keep your options open with current partners.
If the lab confirms an HIV diagnosis, the modern treatment picture is genuinely different from what older media still imply. Antiretroviral therapy (ART) suppresses HIV to undetectable levels in the majority of people who take it consistently, and once viral load is undetectable, HIV cannot be transmitted to sexual partners. The CDC documents this as Undetectable equals Untransmittable, often shortened to U=U (CDC, HIV treatment). Starting treatment early protects long-term health and partner safety. Counseling, including 15-minute virtual sessions through services like the CDC's National HIV/AIDS hotline (1-800-CDC-INFO) or HIV.gov's provider locator, is available without judgment and without insurance hurdles.
No single test can provide a full HIV positive diagnosis; confirmatory testing is required.
If the Result Is Non-Reactive but You Are Still Worried
A single C line is the result almost everyone wants, and yet the days afterward are sometimes still spent quietly second-guessing it. That is not a personal failing; it is the predictable response to a test that has a window period.
The doubt usually narrows to one of two questions: did the test run correctly, or did you test too early. A clear C line answers the first one; that is exactly what the control line is there for. The second question is the one worth thinking about. If your possible exposure was within the last 14 days, plan a retest at six weeks. If exposure was within the last six weeks, retest at twelve weeks. If you genuinely have no specific exposure event in mind and you are testing as part of routine sexual-health screening, a current non-reactive home test is meaningful as long as you have not had a new partner in the last 90 days.
Acute HIV symptoms (fever, sore throat, swollen lymph nodes, rash) can also overlap with many viral illnesses and are not specific enough to override a properly-timed negative test. If symptoms are pronounced and your exposure was recent, a clinic visit for a fourth-generation antigen-antibody test or NAT will close the loop faster than another home antibody test, since those lab tests have shorter window periods.
Exposure within the last 14 days: plan a repeat antibody test at 6 weeks. Within the last 6 weeks: retest at 12 weeks. Within the last 6 to 12 weeks: a current non-reactive result is increasingly conclusive, and a 12-week test closes it. No specific exposure in the last 90 days: a current non-reactive home test is generally enough.
Privacy: Discreet Testing, Discreet Disposal
One of the genuine advantages of an at-home rapid test is that the entire encounter belongs to you. There is no waiting room, no front-desk conversation, no insurance code on a statement. Most reputable home-test vendors ship in plain unmarked outer boxes, and billing line items are usually generic ('health products', 'diagnostics supplier', or a vendor name without medical branding). If discretion matters, check the vendor's shipping and billing FAQ before you order.
Disposing of the used kit safely is the part most articles skip. Used lancets count as sharps waste in many jurisdictions, even at home, and should not be flushed or tossed loosely into household trash where they could prick someone. The cassette, pipette, alcohol wipe, and any blood-contaminated paper can go in regular waste once contained.
The simple at-home protocol: place the used lancet inside a small rigid container (a clean empty plastic bottle with a screw cap works), drop the used cassette and other components into a sealed plastic bag, and place the bag inside the rigid container before tossing it in an opaque trash bag. If you live with roommates and discretion matters, an outdoor bin or trash day timing handles the rest. Do not save the cassette as a record; the result fades and re-reading an old strip days later just produces anxiety.
Two trustworthy options if the result, the wait, or the decision to test feels heavy: the CDC's National HIV/AIDS Hotline at 1-800-CDC-INFO (free, 24/7, no name required) and HIV.gov's provider locator at <a href="https://www.hiv.gov/" target="_blank" rel="noopener noreferrer">hiv.gov</a>, which lists testing sites, treatment providers, and counseling services by ZIP code. Neither asks for insurance or identity to start a conversation.
FAQs
- Can I trust the result from a home rapid HIV test?
- Yes, when the test is used correctly and the timing is right. FDA-cleared rapid HIV self-tests are validated for sensitivity and specificity in real-world conditions, and the published sensitivity for blood-based fingerstick rapids is generally higher than for oral-fluid versions. The two failure modes that matter are testing inside the window period (which can produce a falsely non-reactive result) and procedural errors (which usually produce an invalid rather than a wrong result).
- I see a very faint second line at T. Am I positive?
- If the C line is present and any visible line, even a pale whisper, sits at the T position within the kit's read window, treat it as reactive. The faint line just signals a lower antibody concentration than a bold line would; the antibody binding still happened. Schedule a confirmatory lab test rather than retesting at home.
- I checked the test 30 minutes after the timer ended and saw a new line. Does it count?
- No. Any line that appears only after the kit's printed read window closes is almost certainly an evaporation artifact, not a true antibody-driven result. Always read at the time the instruction sheet specifies, then disregard later changes.
- I tested non-reactive but I still feel sick. Should I trust the test?
- It depends on timing. A non-reactive result is reliable when taken at least 23 days after exposure for antibody self-tests, and more confidently after 6 to 12 weeks. If your possible exposure was very recent and symptoms (fever, rash, sore throat, swollen nodes) are concerning, a clinic-administered fourth-generation antigen-antibody test or NAT has a shorter window period and will close the loop faster.
- Does PrEP affect HIV home test results?
- It can. PrEP can delay or blunt antibody seroconversion in some people, which means antibody-only home tests may turn reactive later than usual. If you are on PrEP and want a precise read, ask your provider for a fourth-generation antigen-antibody lab test, which detects both antigen (earlier) and antibody (later) markers.
- Could a home test give a false positive?
- Rarely, but it can happen. Some autoimmune conditions, recent vaccinations, or technical errors (especially reading past the result window) can produce a falsely reactive line. That is precisely why every reactive home test must be confirmed by a lab test, which uses different chemistry and resolves the question definitively.
- How long should I wait before testing again after a possible exposure?
- For any exposure in the last 90 days, the safest protocol is a repeat antibody test at six weeks and a final confirmatory test at twelve weeks. Beyond 90 days with no new exposure, a current non-reactive result is generally conclusive. If you are on PrEP, ask your provider about a fourth-generation lab test instead, since antibody-only home tests may seroconvert later.
- Do home test kits expire?
- Yes. Most rapid HIV cassettes have a shelf life of 12 to 24 months from manufacture, printed on the foil pouch and outer box. Using an expired kit can produce falsely non-reactive results because the reagents lose sensitivity. Check the date before you start, and keep an unopened backup kit on hand if you are testing solo.
- U.S. Centers for Disease Control and Prevention. HIV testing overview, including window periods for antibody, antigen-antibody, and nucleic acid tests, and current guidance on confirmatory testing after a reactive self-test.
- U.S. Centers for Disease Control and Prevention. HIV treatment overview, including antiretroviral therapy (ART), undetectable viral load, and the Undetectable equals Untransmittable (U=U) framework for treatment as prevention.
- U.S. Centers for Disease Control and Prevention. About HIV, including transmission routes, prevention options (PrEP, PEP, condoms), acute infection symptoms, and current epidemiology.
- World Health Organization. HIV/AIDS fact sheet covering global testing guidance, the role of HIV self-testing in expanding access, and the requirement for confirmatory testing after a reactive screening result.
- HIV.gov. National provider locator for HIV testing sites, treatment providers, and counseling services, plus plain-language overviews of HIV testing, prevention, and treatment.